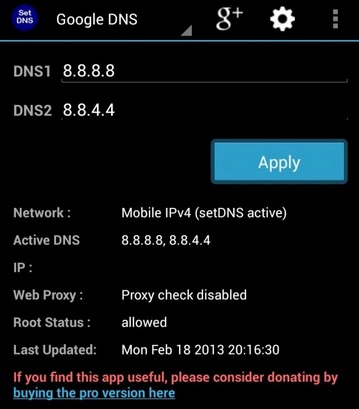
DNS that is Domain Name server is essential to run the internet on your device properly. When we open any website the first thing that we need to do is to type the website address in the address bar. Now DNS changes this web address to IP address and provides us the URL. The internet become very slow sometimes due to the issue related to DNS. Every device has a default device but this can be changed to increase the speed of the internet.
There are two DNS available, Open DNS and Google DNS these can be used in place of default DNS. In order to change DNS in Android you need to download an app called SetDNS from Google Play Store. Also it is must to have root access in your device otherwise it is not possible to change DNS in Android. Both the alternative DNS is free of cost. The below steps will help you to change DNS in your android device.

Steps to change DNS in Android
- First you need to download that app called SetDNS which is available in Google Play store and it is not chargeable.
- So enter into Google Play Store and install SetDNS from here.
- Now start the SetDNS app.
- As you open it for the first time you will be asking a question with two options- Deny and Grant. It asks for the Superuser consent. You need to press the Grant button and it will take you to the next page.
- In the next page you will find out a drop down box at the top corner which includes all the name of the DNS server.
- Now you can choose that server from the list that you want. If you want to replace your DNS with Google DNS then choose that name and again it will take you to a new page.
- Press the ‘Apply’ button to set Google DNS as your DNS. Similarly you can choose Open DNS and apply to set it.
- If you want to go back to the default DNS that is also done from here.
By following these steps you can easily change the DNS in your android phone.
Leave a Reply